A quick guide to getting started with Vue3, Vite, and ExpressJS & NodeJS for our backend. Let's jump right in!
First, Let's Setup Vue3
First let's make a directory to house our app and open that directory.
mkdir vue3-express
cd vue3-express
Next, make sure you're up to date with node, npm, etc. and run the following.
npm init vue@latest
This will walk through the official Vue3 install script. It will ask you to name your app. I named mine client.
For the rest of the questions, if you don't know the answer I recommend you answer no. When done with these questions, you will have a starter Vue3 app!
Finish the install by changing into the directory and installing the npm packages (use the following code):
  cd client
  npm install
  npm run dev
Hooray, we should now have a Vue starter app running! Navigate to http://localhost:5173/ to see it. Mine looks like this:
Setting up ExpressJs
Now we install ExpressJs. First, we should start a new terminal in our parent directory named vue3-express. Then create a new directory for our server, which I will name this directory server. We then move into our server directory and initialize it in npm.
mkdir server
cd server
npm init
Next, we install our needed modules: ExpressJs for our API posts, and Body-Parser to get the posted data. We install these by running the following.
npm install express
npm install body-parser
Next, we setup our server script. Create a new file titled server.js (or whatever you want to name your server file) and add the following:
const express = require('express')
const app = express()
const port = 3000
const bodyParser = require('body-parser');
app.use(bodyParser.json());
app.use(bodyParser.urlencoded({ extended: false }));


app.post('/api', (req, res) => {
  console.log(req.body)
  res.status(200).json({ result: req.body.text });
})

app.listen(port, () => {
  console.log(`Example app listening on port ${port}`)
})
The above is a very simple node server using express as a middleware to capture post data from our client.
Start the server by running:
node server.jsFinally, Let's Configure Vite and Create a Vue3 Test Form
Open a new terminal window and move back into our client directory and install Axios for post requests. Run the following:
cd client
npm install axios
First, let's configure Vite to proxy our server so the client and server ports can talk to each other. Open vite.config.ts and add the the proxy info such that the entire file will now look like this:
import { fileURLToPath, URL } from 'node:url'

import { defineConfig } from 'vite'
import vue from '@vitejs/plugin-vue'

// https://vitejs.dev/config/
export default defineConfig({
  plugins: [
    vue(),
  ],
  resolve: {
    alias: {
      '@': fileURLToPath(new URL('./src', import.meta.url))
    }
  },
  server: {
		proxy: {
			'/api': {
				target: 'http://localhost:3000',
				changeOrigin: true,
				secure: false,
				ws: true,
			},
		},
	}
})
Next, lets completely rewrite our App.vue file (inside the src directory) so that it is a test form, to try out our post:
<template>
<div>
<main class="main">
<form @submit.prevent="onSubmit">
<input
type="text"
placeholder="Enter Anything"
v-model="testInput"
/>
<input type="submit" value="Test Server" />
</form>
<div class="result">{{result}}</div>
</main>
</div>
</template>
<script lang="ts">
import { defineComponent, onMounted, ref } from 'vue'
import axios from 'axios'
export default defineComponent({
data() {
return {
testInput: "" as string,
result: "" as string,
}
},
methods: {
onSubmit() {
try {
axios
.post("/api", { text: this.testInput })
.then((response) => {
this.result = response.data.result;
}, (error) => {
throw error || new Error(`Request failed`);
})
} catch(error:any) {
// Consider implementing your own error handling logic here
console.error(error);
alert(error.message);
}
}
}
});
</script>
<style>
@font-face {
font-family: "ColfaxAI";
src: url(https://cdn.openai.com/API/fonts/ColfaxAIRegular.woff2)
format("woff2"),
url(https://cdn.openai.com/API/fonts/ColfaxAIRegular.woff) format("woff");
font-weight: normal;
font-style: normal;
}
@font-face {
font-family: "ColfaxAI";
src: url(https://cdn.openai.com/API/fonts/ColfaxAIBold.woff2) format("woff2"),
url(https://cdn.openai.com/API/fonts/ColfaxAIBold.woff) format("woff");
font-weight: bold;
font-style: normal;
}
.main,
.main input {
font-size: 16px;
line-height: 24px;
color: #353740;
font-family: "ColfaxAI", Helvetica, sans-serif;
}
.main {
display: flex;
flex-direction: column;
align-items: center;
padding-top: 60px;
}
.main .icon {
width: 34px;
}
.main h3 {
font-size: 32px;
line-height: 40px;
font-weight: bold;
color: #202123;
margin: 16px 0 40px;
}
.main form {
display: flex;
flex-direction: column;
width: 320px;
}
.main input[type="text"] {
padding: 12px 16px;
border: 1px solid #10a37f;
border-radius: 4px;
margin-bottom: 24px;
outline-color: #10a37f;
}
.main ::placeholder {
color: #8e8ea0;
opacity: 1;
}
.main input[type="submit"] {
padding: 12px 0;
color: #fff;
background-color: #10a37f;
border: none;
border-radius: 4px;
text-align: center;
cursor: pointer;
}
.main .result {
font-weight: bold;
margin-top: 40px;
}
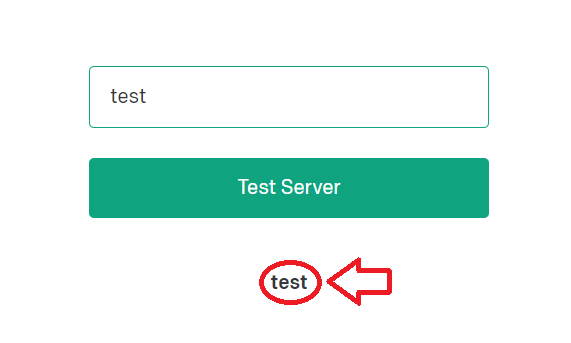
</style>Now, you should be able to see the new form at http://localhost:5173/. When you enter information and submit the form, you should see this info log on the server and then see it sent back to the client.

Congrats, you've setup a new node app using Vue3, Vite, and ExpressJS! Thanks for reading and hope this helps.
